It looks quite unassuming until you pop a battery tealight inside & light up the moon!


(Click on the graphic to go to the JAI challenge)
The starry night sky was created by punching Dazzling Diamonds glimmer paper with the Confetti Star Border Punch. Each star was added using a teeny dob of Crystal Effects. I used the large circle punch to create the moon aperture in the black cardstock layer, then used a slightly larger circle die to cut the corresponding openings in the white & cherry layers. The sleigh image was stamped on the vellum with Staz On. The house was stamped on whisper white cardstock with memento ink & coloured with Blendies. Tiny pearls (coloured red) have been added to the fussy cut pine tree. The banner end was cut with the hexagon punch & the house & tree are lifted up on dimensionals.
There are still a couple of days left to play in The Paper Players challenge which you can find by clicking on the graphic below:-

Thanks for stopping by! :)
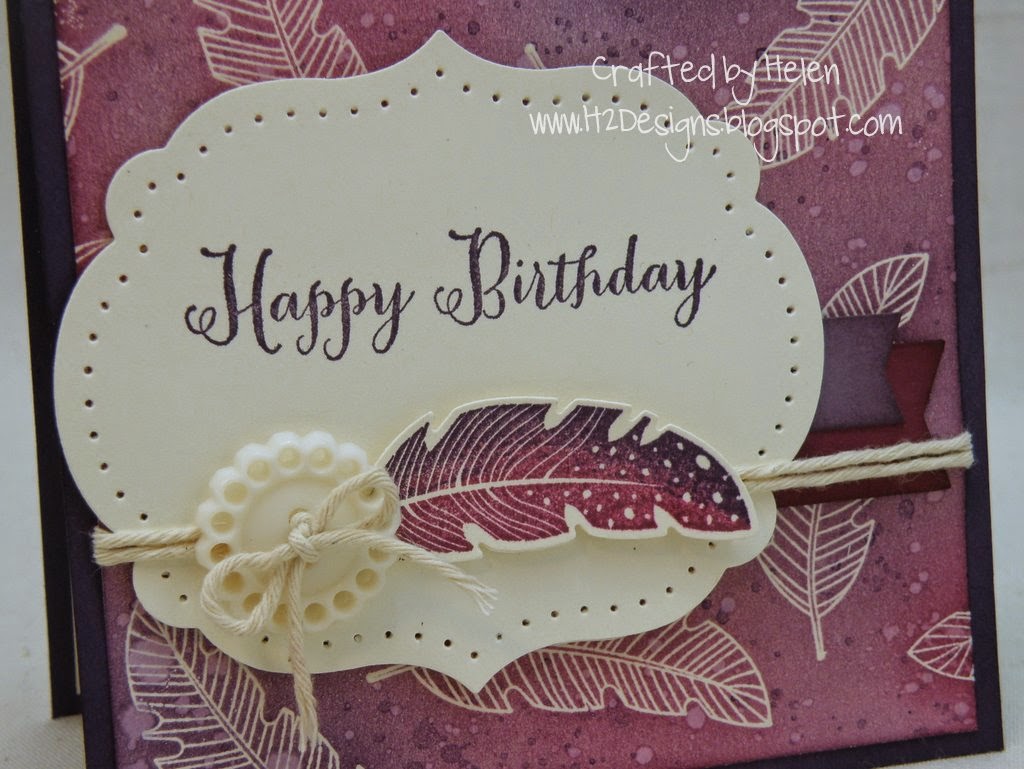
Card Components
All SU


%2BMinion%2BBits.jpg)
%2BMinion%2BExtreme%2BClose%2BUp.JPG)